Case Binding
What happens in the case binding process?
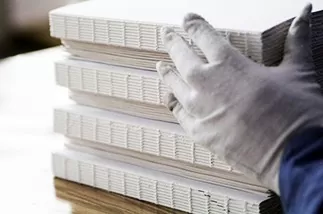
If you’re deciding on a cover type for your project, you may be wondering how different covers are made. Case binding, also called hardcover binding, gets its name from the hard outside “case” used to cover books. Hardcover books are bound differently than softcover books and can encompass different types of paper. Case-bound books with fewer than 60 pages are expertly hand-assembled, while those with higher page counts are assembled by machine.
How Case Binding is Made
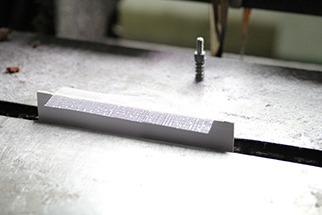
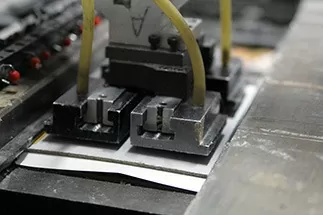
As with other binding methods, casebound books start with printed parent sheets, which are cut, folded, and gathered. Then, the pages are smyth sewn into a book block. Cloth is then added to the spine area, where it will be glued into the case.
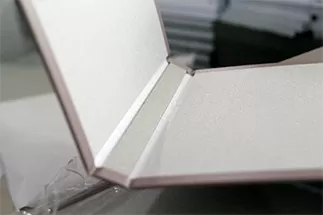
The case (the hard cover of the book) is made next. Assembly teams glue and fold a printed sheet (your cover, spine, and back design) around three pieces of board.
Finally, the inside pages (the book block) are glued into the hard cover (the case). In books with 60 pages or more, endsheets are also used to firmly secure the book block to the case.
The final assembly process varies according to different page counts. Lower page counts are hand-assembled, while higher page counts can be machine-assembled. While the gutter and binding of hand-assembled books is more visible, every case-bound book we produce always meets our high PrintNinja quality standards.


Design Considerations
Your inside covers will consist of pages glued to the inside of the hardcover case. Authors may wish to include blank pages to preface their work, so be sure these are incorporated into your submitted artwork if you see fit.
When it comes to the interior pages, be mindful that due to the nature of casebound books, content that is very close to the binding area may be obscured. Please keep any important text and artwork 0.125″ away from the bound edge (the center of the page for two-page spreads) to be fully visible.
Hardcover books under 60 pages are bound manually. Given this, be mindful of selecting 85 lb. or lighter as these weights can occasionally experience minor wrinkling along the gutter since they’re not as durable as 105lb or above. If your project exceeds 60 pages, you’ll also have an opportunity to design endsheets. Remember, these special pages secure the book block to the cover. Your design options for these are virtually endless! Some authors select endsheets in solid colors, while others choose eye-catching designs suited for their book’s overall tone or theme. This decision is entirely yours to make! Please be sure to reference this design considerations page here as well when setting up your artwork.
You have many options to consider for your cover design, too. Again, your cover design is printed on a single sheet and glued around three pieces of board. You will therefore need to envision your book’s cover, spine, and back of your book, and come up with a design with proper measurements. Your design will also leave a little extra space for bleed, fold cover, and hinge. We’ll walk you through these considerations in our case binding cover layout guide, where you can also find our automated template generator.
Finally, you can also consider a dust jacket to give your hardcover an extra-professional feel and an added layer of protection. You can find the file setup guide for this here!
Production Time
After being sent to press, case-bound projects take approximately three weeks to manufacture. Then, they are shipped out to you via your chosen shipping method. Check our turnaround time page to learn about projected time frames based on proofing and shipping options.
Ready to Get Started?
PrintNinja’s hardcover book calculator makes it easy to take the next step in creating your hardcover book. Our calculator is pre-populated with popular options, but you can customize just about anything. You can also save your quote for 90 days, so it’s no problem if you’re not quite ready to print yet.
Get My Price